
A guide on how to mint an NFT in a decentralized manner by the use of alchemy, ethers.js, and pinata
As part of this article, we are trying to mint an NFT on the server side (nodejs) using alchemy, ethers.js and pinata apis on Polygon Mumbai Testnet.
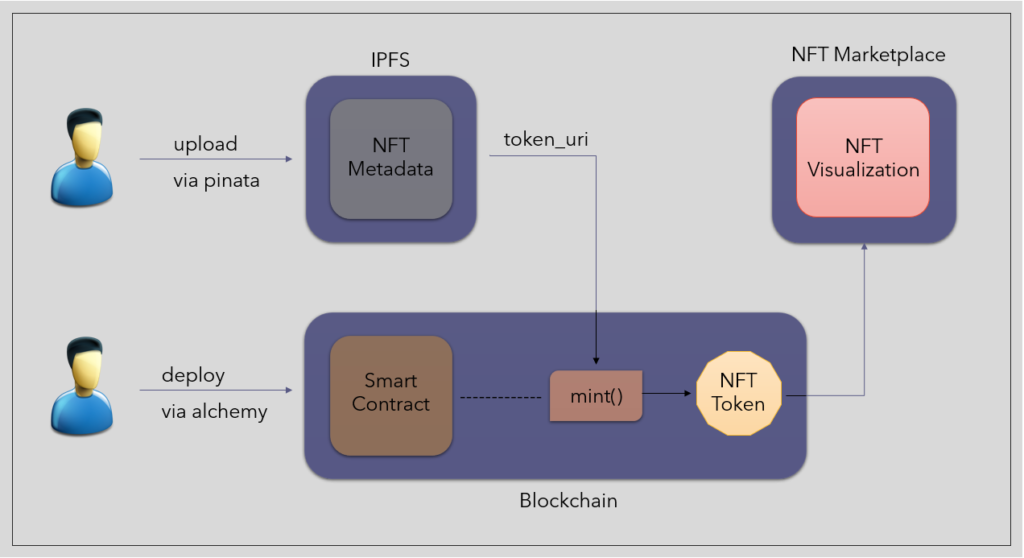
Minting an NFT is like placing our digital assets onto the blockchain so that they can be traded in NFT marketplaces.
As per blockchain, NFT is like a transaction of metadata. So apparently, minting an NFT is the process of executing that transaction on the blockchain.
How the NFT Minting Architecture looks?
Alchemy
Alchemy is a middleware that makes blockchain communication easier for developers.
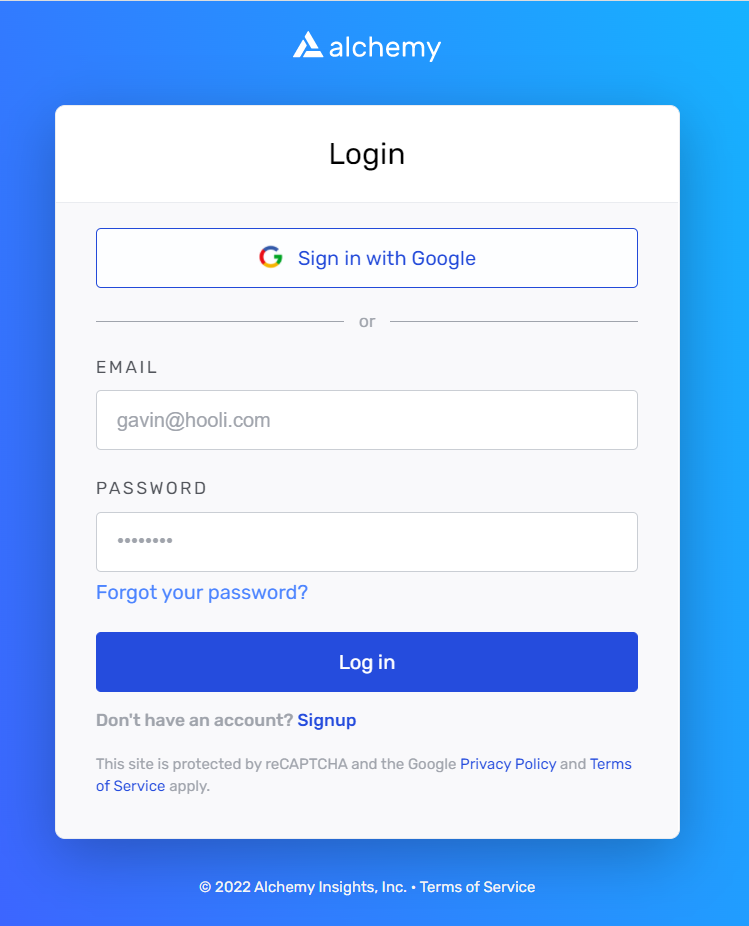
Create a free account on Alchemy https://www.alchemy.com/ and use their development platform and APIs to request the blockchain.
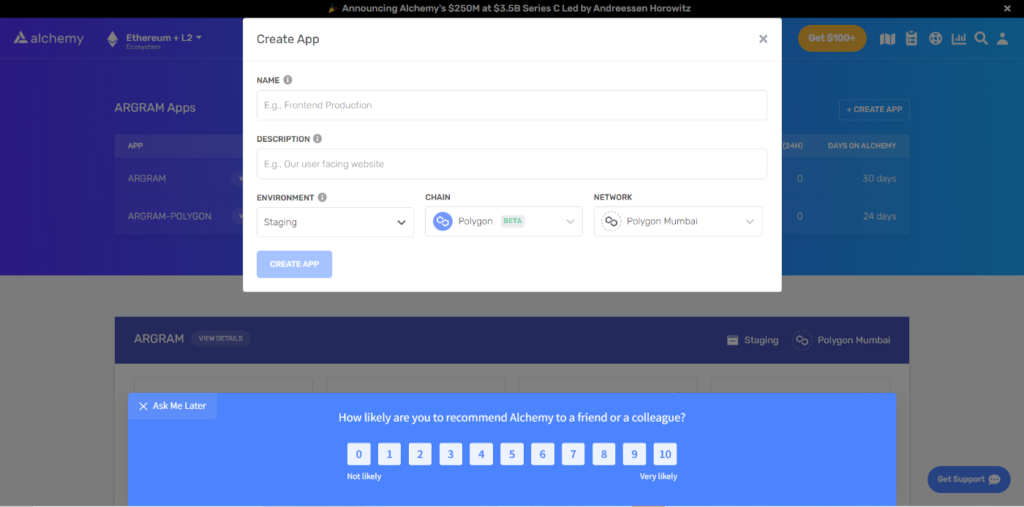
Alchemy account setup
Create a new app on alchemy by choosing the required blockchain network.
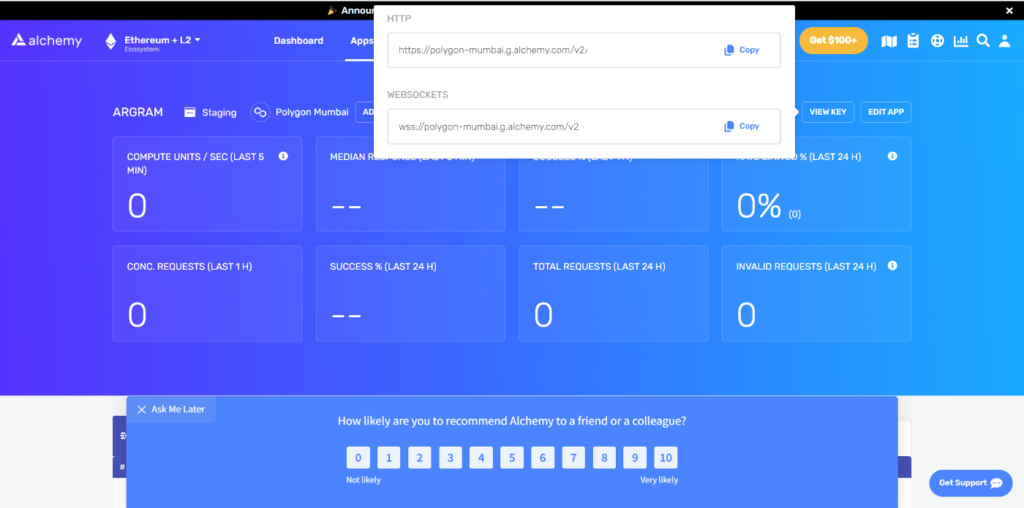
Copy the HTTP URL as we need it to connect to the blockchain network.
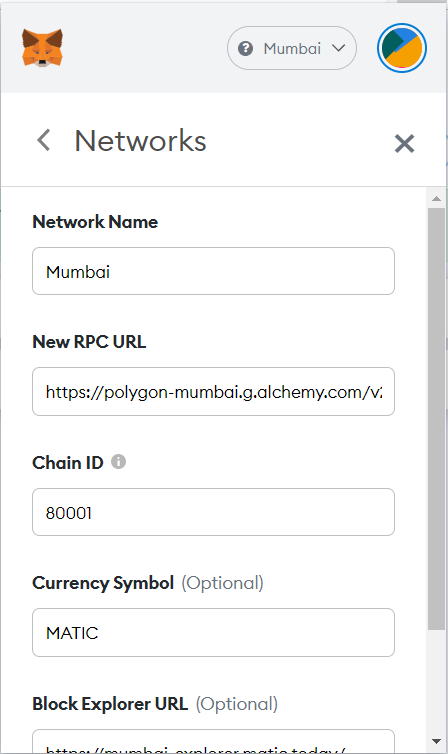
Now, we need to add Polygon Mumbai testnet to your metamask account.
Add the Alchemy URL as RPC URL and set chain ID as 80001. You can verify the chain ID in https://chainlist.org/. MATIC is the token handled in polygon blockchain.
Ethers.js
Ethers.js is a library that allows us to interact with the Ethereum blockchain.
Install ethers.js as below:
npm install --save ethersMinting an NFT in a decentralized manner, how? —using IPFS, a decentralized storage platform, where we will be storing our NFT metadata.
IPFS & Pinata
IPFS (InterPlanetary File System) is a peer-to-peer protocol like torrent.
It decentralizes the entire file hosting process. When we upload a file to IPFS, it gets distributed across every node which then becomes a server so that no one can take down a file. We are hosting our NFT metadata on IPFS.
Pinata is an interface of IPFS that makes it easier to host files on IPFS.
We can upload image files as well as JSON metadata to the Pinata.
Create a free account on pinata: https://app.pinata.cloud/signin.
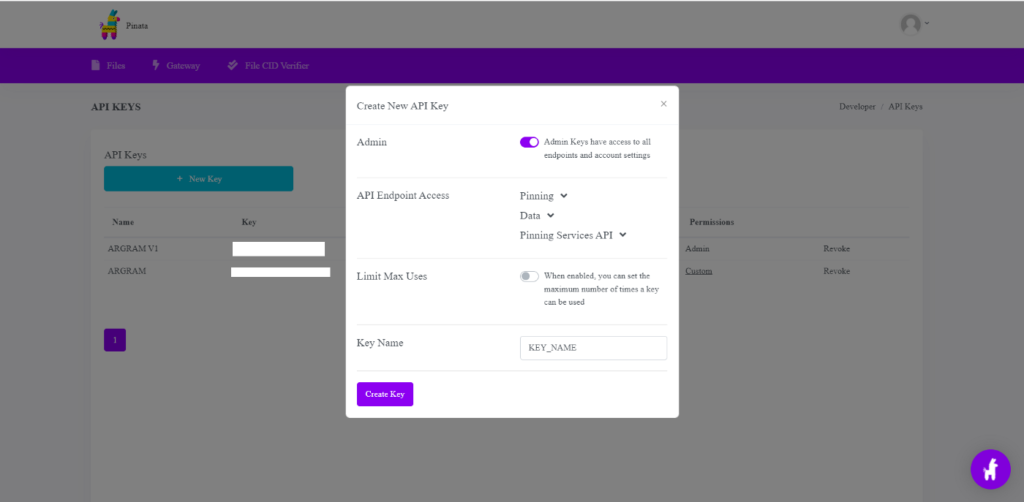
Create new API key to access it. You will get an API key as well as a secret key.
Now let’s delve into NFT minting!
Step 1: Get some fake MATIC
As blockchain transactions are bound to gas fees, we need to collect some fake MATIC to mint our NFT.
Get some fake MATIC from here: https://faucet.polygon.technology/.
Other MATIC faucets available:
- https://faucet.pearzap.com/
- https://matic.supply/
- https://www.coinclarified.com/tools/faucets/polygon
- https://faucet.firebird.finance/
Step 2: Create a .env file
The .env file should contain the following details:
API_URL = “your alchemy URL"
PRIVATE_KEY = “metamask private key”
PUBLIC_KEY = “your metamask wallet address”
CONTRACT_ADDRESS =”deployed contract address"
PINATA_API_KEY = “pinata api key”
PINATA_SECRET_KEY = “pinata secret key”
Step 3: Create your nft.js file
Copy the following content to the file.
require("dotenv").config();
const fs = require("fs");
const FormData = require("form-data");
const axios = require("axios");
const { ethers } = require("ethers");//Grab the contract ABI
const contract = require("../artifacts/contracts/ArGram.sol/ArGram.json");
const {
 PINATA_API_KEY,
 PINATA_SECRET_KEY,
 API_URL,
 PRIVATE_KEY,
 PUBLIC_KEY,
 CONTRACT_ADDRESS
} = process.env;
Firstly, make sure you have successfully authenticated the Pinata API.
const authResponse = await    axios.get("https://api.pinata.cloud/data/testAuthentication", {
        headers: {
           pinata_api_key: PINATA_API_KEY,
           pinata_secret_api_key: PINATA_SECRET_KEY,
        },
});
Your authResponse should contain a message like “Congratulations! You are communicating with the Pinata API!”.
Now, read the image file from your local system.
 const stream = fs.createReadStream(req.file.path);
 const data = new FormData();
 data.append(“file”, stream);
Upload image file to IPFS using pinFile API. On success, it will return a hashcode.
const fileResponse = await axios.post("https://api.pinata.cloud/pinning/pinFileToIPFS", data, {
        headers: {
           “Content-Type”: `multipart/form-data; boundary=  ${data._boundary}`,
            pinata_api_key: PINATA_API_KEY,
            pinata_secret_api_key: PINATA_SECRET_KEY,
        },
 });
        const { data: fileData = {} } = fileResponse;
        const { IpfsHash } = fileData;
        const fileIPFS= `https://gateway.pinata.cloud/ipfs/${IpfsHash}`;
Your fileIPFS should be like https://gateway.pinata.cloud/ipfs/<image-hash>
eg: https://gateway.pinata.cloud/ipfs/QmeK8t9Lom2AcH8s7gLpuZordcxisegwkcSJpqL46S87uC
Now we can upload JSON metadata to IPFS using pinJSON API. On success, it will return a hash code that we will be using as the token URI to mint.
//Create NFT metadata JSON
const metadata = {
   image: https://gateway.pinata.cloud/ipfs/QmeK8t9Lom2AcH8s7gLpuZordcxisegwkcSJpqL46S87uC",
   name: "MyArGramNFT",
   description: "MyArGramNFT Description",
   attributes: [
        { "trait_type": "color", "value": "brown"},
        { "trait_type": "background", "value": "white"}
   ]
}const pinataJSONBody = {
      pinataContent: metadata
};
const jsonResponse = await axios.post("https://api.pinata.cloud/pinning/pinJSONToIPFS", pinataJSONBody, {
    headers: {
       “Content-Type”: `application/json`,
        pinata_api_key: PINATA_API_KEY,
        pinata_secret_api_key: PINATA_SECRET_KEY,
    },
 });
 const { data: jsonData = {} } = jsonResponse;
 const { IpfsHash } = jsonData;
 const tokenURI = `https://gateway.pinata.cloud/ipfs/${IpfsHash}`;
Your tokenURI should be like https://gateway.pinata.cloud/ipfs/<json-hash>
eg: https://gateway.pinata.cloud/ipfs/QmammqqQDpmk4oAuyfgJA9Ni7ChEzxEkmzQLLhjbGAKHax
Finally, we can mint our token URI which we got from IPFS json upload. Call the mintNFT method that we have written in our smart contract. Refer to the smart contract given below:
Use your private key to sign the transaction.
const provider = new ethers.providers.JsonRpcProvider(API_URL);
const wallet = new ethers.Wallet(PRIVATE_KEY, provider);
const etherInterface = new ethers.utils.Interface(contract.abi);
// Get latest nonce
const nonce = await provider.getTransactionCount(PUBLIC_KEY, "latest");
// Get gas price
const gasPrice = await provider.getGasPrice();
// Get network
const network = await provider.getNetwork();
const { chainId } = network;
//Transaction object
const transaction = {
   from: PUBLIC_KEY,
   to: CONTRACT_ADDRESS,
   nonce,
   chainId,
   gasPrice,
   data: etherInterface.encodeFunctionData("mintNFT",
         [ PUBLIC_KEY, tokenURI ])
};
//Estimate gas limit
const estimatedGas = await provider.estimateGas(transaction);
transaction["gasLimit"] = estimatedGas;
//Sign & Send transaction
const signedTx = await wallet.signTransaction(transaction);
const transactionReceipt = await provider.sendTransaction(signedTx);
await transactionReceipt.wait();
const hash = transactionReceipt.hash;
console.log("Your Transaction Hash is:", hash);
// Get transaction receipt
const receipt = await provider.getTransactionReceipt(hash);
const { logs } = receipt;// Get token ID
const tokenInBigNumber = ethers.BigNumber.from(logs[0].topics[3]);
const tokenId = tokenInBigNumber.toNumber();
console.log("Token ID minted:", tokenId);
You will get a response like:
Your Transaction Hash is: 0x9732ca53cfb6b8e29e13873b51407f431bc798cbe3abe82ea110c0e5924506c8
Token ID minted: 1
You can search for this transaction hash on Mumbai polygonscan.
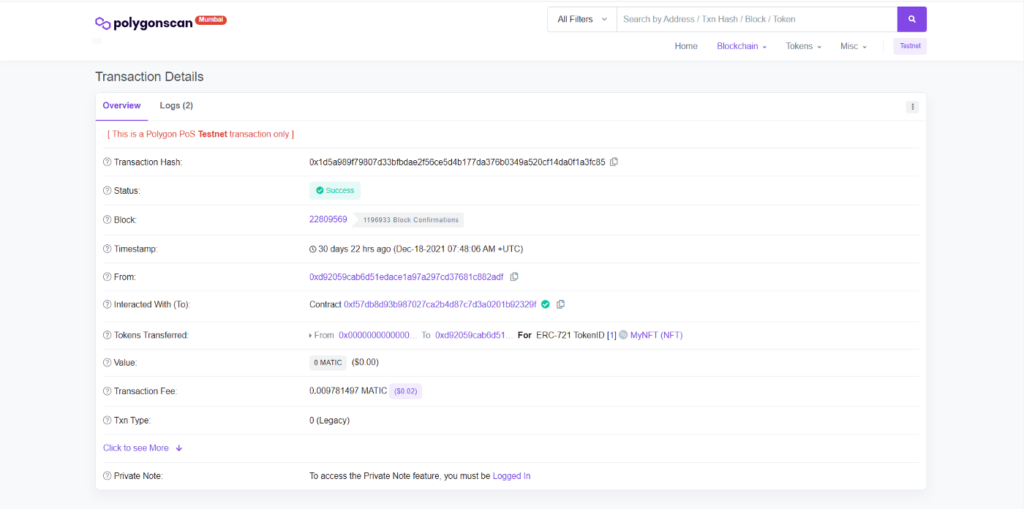
Great! You have successfully minted your first NFT on Polygon Mumbai Testnet.