A guide on how to mint an NFT in a decentralized manner with the help of moralis and web3js
As part of this tutorial, we are trying to mint an NFT using Moralis and Web3js on Polygon Mumbai Testnet.

Minting an NFT is like placing our digital assets onto the blockchain so that they can be traded in NFT marketplaces.
As per blockchain, NFT is like a transaction of metadata. So apparently, minting an NFT is the process of executing that transaction on the blockchain.
Moralis
There can be many ways one can request the blockchain. But Moralis provides the easiest and simplest way of connecting to cross-chains. Moralis is a software or a middleware which helps us to build cross-chain dapps quickly. Using moralis, we can build and deploy our dapps on any blockchain like Ethereum, Polygon, Solana, BSC, and Avalanche. As a developer, we don’t need to customize our dapp for every blockchain as moralis will do the needful. With the use of Moralis, the entire process of creating an NFT can be made as simple as possible.
Moralis account and server setup
- Create a free Moralis account : https://admin.moralis.io/login
2. Create a new server depends on the requirement of dealing with a testnet or a mainnet. First, explore the testnet before getting into the mainnet.

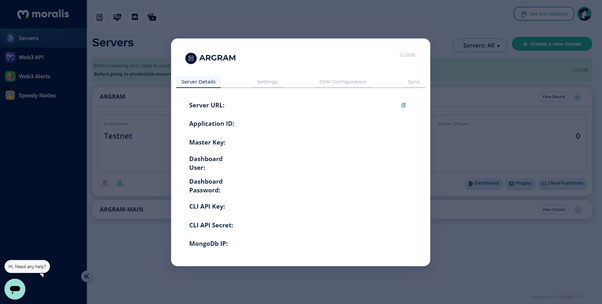
3. Create a Moralis instance by giving a name to your testnet server and choosing a region as well as the blockchains to work with.

4. Copy the Server URL, Application ID and Master Key as we need these server details to connect with Moralis.
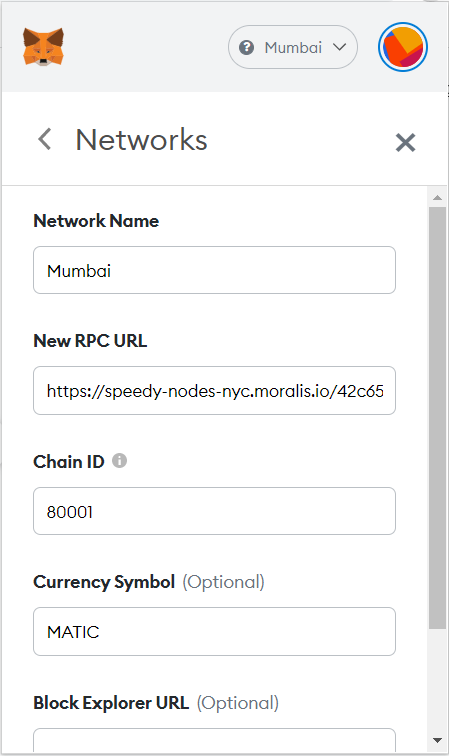
Now, our Moralis server is up, what next? — We need to add Polygon Mumbai testnet to your metamask account.
Moralis provides speedy nodes to quickly connect to the corresponding blockchains.
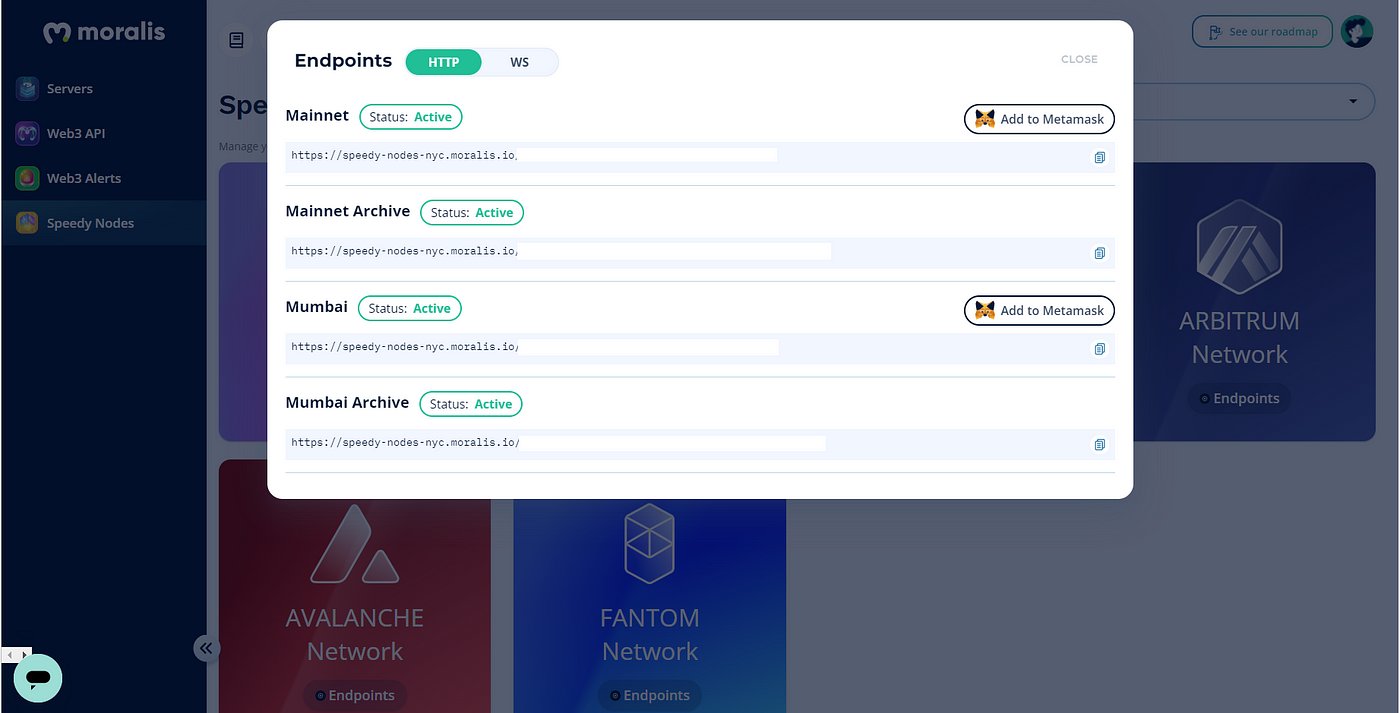
Use the Polygon Mumbai speedy node endpoint as the RPC URL. Chain ID for polygon Mumbai testnet is 80001. You can verify the chain ID in https://chainlist.org/. MATIC is the token handled in polygon blockchain.
Web3js
Web3js is a library that allows us to interact with the Ethereum blockchain.
Install web3 as below:
npm install web3
How to Mint an NFT in a decentralized manner? — using IPFS decentralized storage solution. Kudos to Moralis as it provides native support for IPFS so that we don’t need to handle IPFS separately.
IPFS
IPFS (InterPlanetary File System) is a peer-to-peer protocol like torrent.
It decentralizes the entire file hosting process. When we upload a file to IPFS, it gets distributed across every node which becomes a server so that no one can take down a file. We are hosting our NFT metadata on IPFS.
Now lets jump into the process of minting an NFT.
Step 1: Install Moralis Package in your nodejs project
npm install moralis/node
Step 2: Initialize your Moralis server
require("dotenv").config();
const express = require("express");
const Moralis = require(“moralis/node”);
const app = express();const {  PORT,  MORALIS_SERVER_URL,  MORALIS_APP_ID,  MORALIS_MASTER_KEY,} = process.env;app.listen(port, async () => {   await Moralis.start({      serverUrl: MORALIS_SERVER_URL,      appId: MORALIS_APP_ID,      masterKey: MORALIS_MASTER_KEY,   });});
Step 3: Create .env file
Your .env file should look like below:
MORALIS_SERVER_URL = "moralis server URL"MORALIS_APP_ID = "moralis app Id"MORALIS_MASTER_KEY = "moralis master key"PORT = "port"PRIVATE_KEY = "metamask private key"PUBLIC_KEY = "your metamask wallet address"CONTRACT_ADDRESS = "deployed contract address"POLYGON_MUMBAI_RPC_PROVIDER = "moralis Mumbai Speedy Node RPC URL"
Step 2: Create your nft.js file
Copy the following content to the file.
require("dotenv").config();const Web3 = require("web3");const request = require("request-promise");const fs = require("fs");const contract = require("../artifacts/contracts/ArGram.sol/ArGram.json");const provider = new Web3.providers.HttpProvider(POLYGON_MUMBAI_RPC_PROVIDER);const web3 = new Web3(provider);web3.eth.accounts.wallet.add(PRIVATE_KEY);const nftContract = new web3.eth.Contract(contract.abi, CONTRACT_ADDRESS);fs.readFile(req.file.path, async (err, buffer) => {    const image = buffer.toString("base64");
    const contentType = req.file.mimetype;    //Upload image file to IPFS
    const file = new Moralis.File("file", image, contentType);
    await file.saveIPFS({ useMasterKey: true });
    const fileIPFS = file.ipfs();    //Create JSON metadata
    const metadata = {
       name: "MyNFT",
       description: "MyNFT Description",
       image: fileIPFS,
    };    //Upload JSON metadata to IPFS
    const toBtoa = Buffer.from(JSON.stringify(metadata)).toString("base64");
    const json = new Moralis.File(`MyNFT-meta.json`, { base64: toBtoa });
    await json.saveIPFS({ useMasterKey: true });
    const tokenURI = json.ipfs();    //Mint NFT
    const nonce = await web3.eth.getTransactionCount(PUBLIC_KEY, “latest”);
    const transaction = {
        from: PUBLIC_KEY,
        to: CONTRACT_ADDRESS,
        nonce: nonce,
        gas: 500000,
        data: nftContract.methods
                     .mintNFT(PUBLIC_KEY, tokenURI)
                     .encodeABI(),
    };
    const signPromise = await web3.eth.accounts.signTransaction(
        transaction,
        PRIVATE_KEY
    );
    const signedTransaction = await web3.eth.sendSignedTransaction(
        signPromise[“rawTransaction”]
    );
    const hash = signedTransaction[“transactionHash”];
    console.log('The transaction hash is:', hash);
}
You will get a transaction hash like: 0x9732ca53cfb6b8e29e13873b51407f431bc798cbe3abe82ea110c0e5924506c8
You can search for this transaction on mumbai polygonscan.

Great! You have successfully minted your first NFT on Polygon Mumbai Network.